Astrophotos using Barn Door Tracker (1st Version)
The Setting
After I completed my 1st version of the barn door tracker, I quickly took it on my first guided astrophotography field trip. I can't really remember how long ago was that. I guess it was a few years back. The location I set up my stuff was an open space near my block. At that time, the open space was still undeveloped and was relatively dark. However, the expressway was just nearby, so the streetlights and lights from nearby blocks became the largest sources of light pollution. Today, it has become a neighbourhood park with plenty of lamps. The pollution is obviously worse.
The general setup was as follows:
Camera: Yashica FX-3 Super (2nd-hand Manual SLR)
Lens: Yashica 50mm 1:1.9 prime lens
Film: Fujifilm Velvia ISO50 slide film
Aperture: F1.9
Exposure Time: Around 2 to 4 mins, bracketed.
As the 50mm lens was not powerful enough to take any deep sky objects, I could only focus on taking constellations. For each constellation, I took 3 bracketed shots. I can't remember the exact exposure times as I did not properly document the whole process. I guess they should be 1 min, 2 min and 4 min. Bracketing helped me to get the correct exposure with at least 1 of the 3 shots. It also helped me to test the accuracy of the tracking.
I used slide films because I was attending a photography field trip for my basic photography course at that time. The instructor wanted us to take night scenes using slide films. I couldn't finish all the shots, so I decided to use the rest for this purpose. My instructor told me that slide films have the best resolution and picture quality given its slow ISO rating and extremely fine grain. The slow ISO rating also cuts down on light pollution from surrounding light. This is because, as my instructor taught, dim light sources (noise and light pollution) are captured more slowly on the slides than strong light sources (the stars and nebulae). This increases the contrast as well.
However, some articles on the Internet argued that a slow film means the tracker must be more accurate and one must take longer exposures. This will cause a side effect called reciprocal effect. On the other hand, for higher ISO films stars are captured faster. So, less time is needed to capture the same amount of details which puts less stress on the tracker. It also prevents the reciprocal effect from affecting the shots. Seemed confusing but anyway, the only way to find out was to try it out for myself.
It was only recently that I decided to send the slides to my favourite photo lab to be scanned and digitised into high resolution JPEG image files for long term storage purposes. Each file is about 10 to 15MB in size. Then, I applied some simple post-processing techniques I have learnt on the Internet such as sharpening, adjustment of brightness, contrast, setting the black and white points using Adobe Photoshop. There are more advanced techniques like removing vignetting and stacking multiple images which I have yet to master.
Surprisely, the final results were quite ok (at least to myself). Most of the stars in the photos look quite point-like which means the tracker was constructed accurately enough although the bubble mechanism was potentially and terribly inaccurate. The slides showed vivid star colours for some of the shots. Some shots had foggy areas which were caused by light pollution.
In the following sections, I will display and describe a few of the best shots. For the benefit of those who are not familiar with the constellations, I have created corresponding outlined versions of each shots to show the constellation outlines. I have also added their corresponding illustrations to help you visualise how they would look like. Please note that the illustrations are not international standards. There can be more than 1 version of the illustrations.
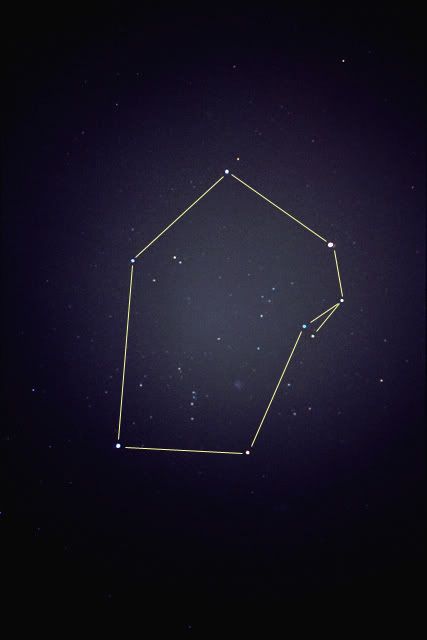
Auriga (The Charioteer)
This is one of the 2 best constellation shots I have taken in the slide series. The other is Orion. The stars are point-like with no visible trace of star trailing. The colours of the stars after post-processing are quite vivid. Light pollution and vignetting effects are acceptably low. There are supposedly a few Messier objects here but can't seem to see them.

Note: If you have noticed a small purple patch slightly below the centre of the photo, don't mistake it for a nebula or some new astronomical object. Some of the slides including this one had turned slightly mouldy. Guess I didn't store them properly.
Below is the outlined version of the photo.
Below is the illustration obtained from http://stardate.org/nightsky/constellations/auriga.html.

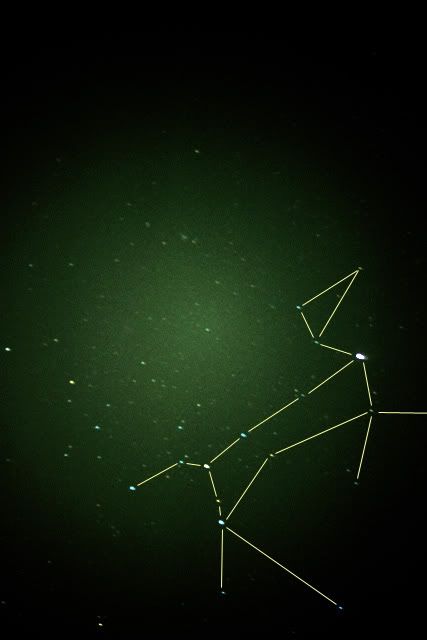
Orion (The Hunter) and Lepus (The Hare)
This is the favourite constellation which fascinated me when I was young. Thankfully, the stars looked very point-like and colourful. This, together with Auriga, are my best shots in the series. You can also see the Orion Nebula, M42, clearly. Below Orion is part of the constellation, Lepus (The Hare).
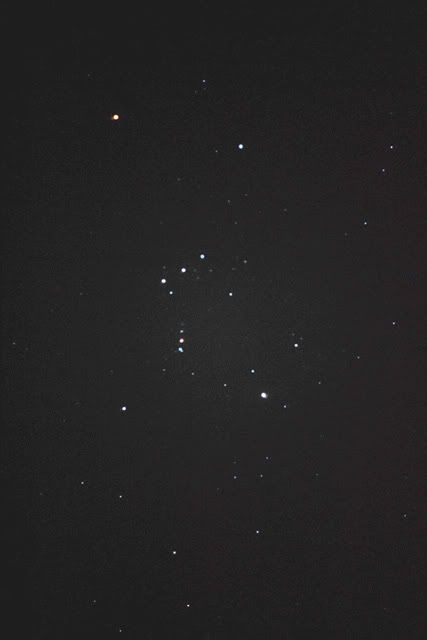
Below is the outlined version of the constellation.
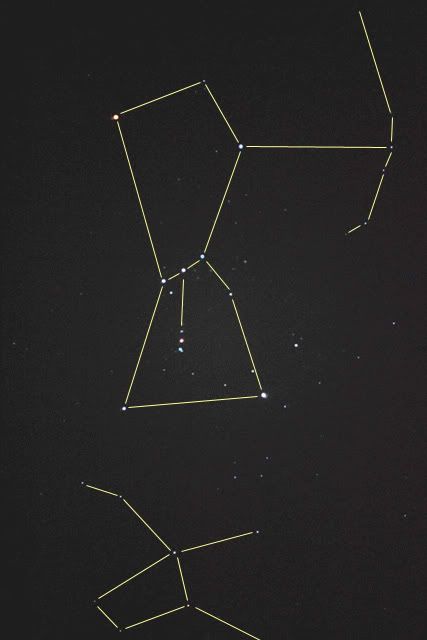
Below is the illustration obtained from http://stardate.org/nightsky/constellations/orion.html, showing a different outline.

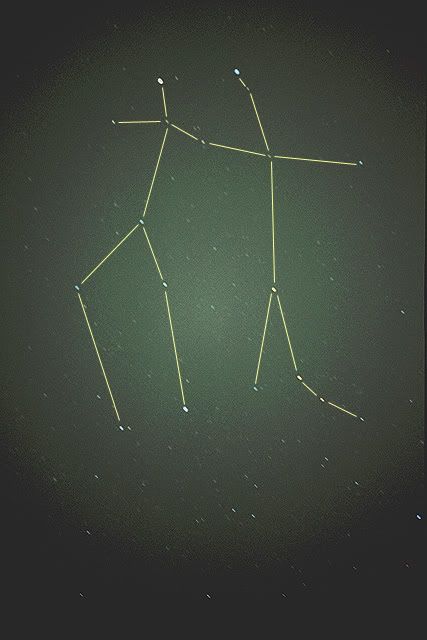
Gemini (The Twins)
This photo was the best among the shots of Gemini. You can see obvious star trailing. The tracker must have been pretty misaligned at that time. The vignetting effect was pretty bad in the central zone especially after Photoshop processing. The colours were still ok.

Below is the outlined version.
Below is the illustration obtained from http://stardate.org/nightsky/constellations/gemini.html.

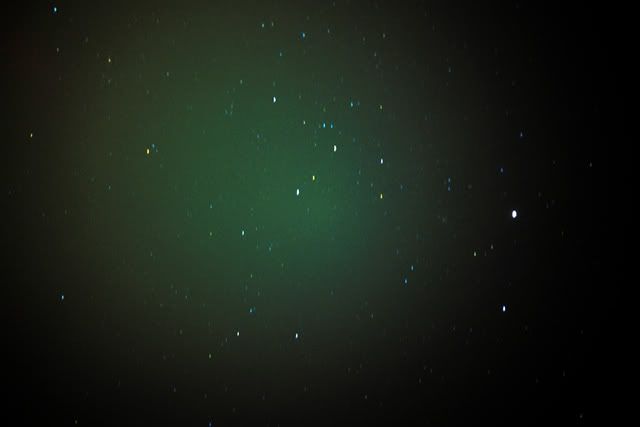
Canis Major (The Greater Dog)
The brightest star in the photo, which is the dog's neck or head is called "Sirius". In Chinese, we called it "Heavenly Wolf Star". It is the brightest star in the night sky.
If you are imaginative enough, you should be able to make out the body, legs and tail of the dog using the other brighter stars. Tracking wasn't very accurate as you can see small trails forming. If you are observant enough, you will noticed that the stars on the left look more point-like than those on the centre and right. This is probably a case of misalignment of the azimuth (magnetic bearing). Light pollution was acceptable though.
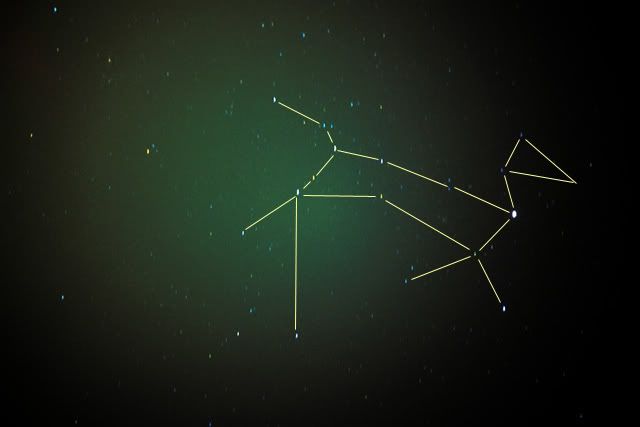
Here's the outlined version of the above photo. This version shows a more clearly defined shape of a dog than other versions. I like this version most.
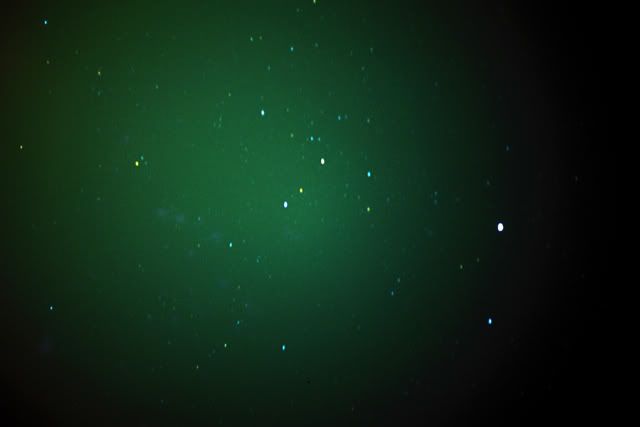
Here's another shot. This one should have a longer exposure than the previous one as the light pollution and stars are much brighter unless I have used the wrong amount of Photoshop adjustments for these 2 shots.
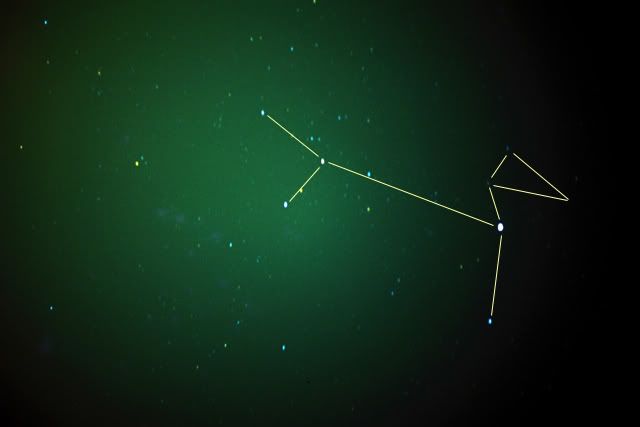
Here's the outlined version of the above photo. It shows another version of the outline, a much simplistic one. Sufficient to allow one to identify the shape of a dog.
Below is yet another shot of the constellation in portrait mode.

Below is the outlined version.
Below is the illustration obtained from http://stardate.org/nightsky/constellations/canis_major.html. Yet another outline version.

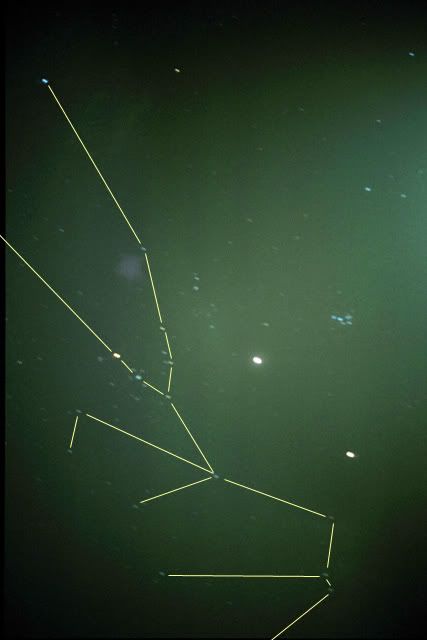
Taurus (The Bull), Jupiter, Saturn (or Mars?) and Pleiades (The Seven Sisters)
For those who are not familiar with this constellation, the "V" shape group of stars near the centre of the photo to the right of the brightest object is the "head" of the Taurus (The Bull). It is a star cluster called "The Hyades". The brightest yellowish star in the group is Aldebaran (Alpha Tau), the brightest star in Taurus.
The brightest object besides the Hyades is supposedly Jupiter. The other second-brightest object below could be Saturn or even Mars. These 2 must be planets because you will not find any such bright stars in that area of the sky if you refer to a star chart.
The compact group of stars at the right of Jupiter is called "The Pleiades" or some might call them "The Seven Sisters". It's a cluster of young blue stars which you can see using even just your bare eyes. There are of course more than 7 stars in the group.
Note: The big purple patch above the Hyades cluster is a mouldy patch of fungus on the slide film. It is not a deep sky object.

Below is the outlined version. This is my favourite version as it closely resembles the shape of a bull.
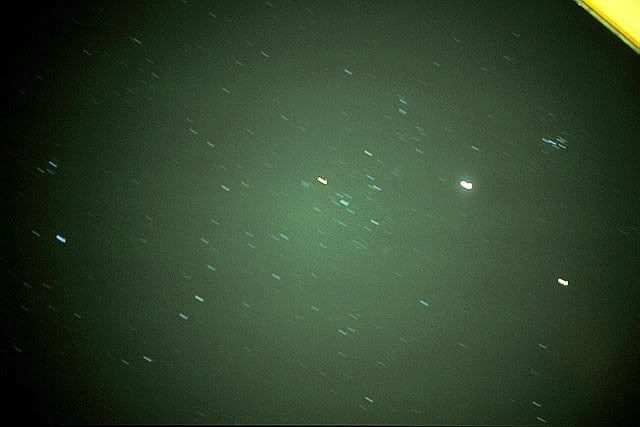
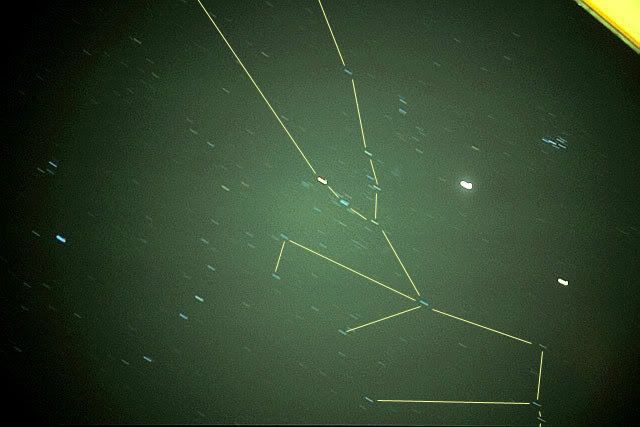
Below is another try on Taurus using landscape mode. Pretty bad tracking. The yellowish triangle at the top right hand corner was part of a housing block.
Below is the outlined version.
Below is the illustration obtained from http://stardate.org/nightsky/constellations/taurus.html, showing another version of the outline.

Crux (The Southern Cross) and Centaurus (The Centaur)
This shot of Crux and Centaurus did not belong to the same slide series as above. It was taken on another night at another location. Can't remember when and where it was taken. However, the settings were pretty much the same except the film used was Fujifilm ISO100 or ISO200 negative film.
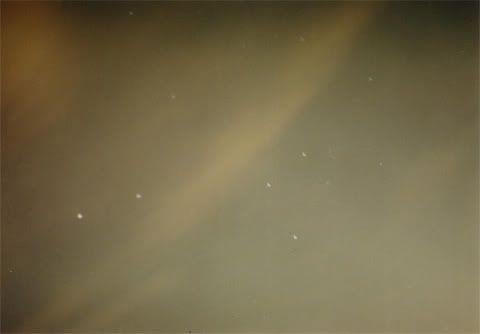
The Crux is slightly to the right of the centre. The 2 bright stars to the left are the 2 brightest stars of Centaurus.
As you can see, the tracking was still ok but the light pollution was terrible. Plenty of clouds too. If you noticed carefully, the leftmost star belonging to Centaurus seemed to be more point-like than the 4 stars of Crux, again probably due to misalignment of the azimuth.
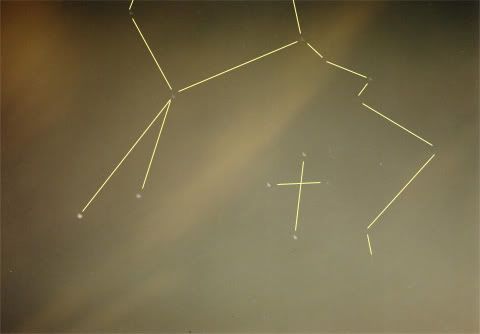
Below is the outlined version of the photo.
This webpage, http://www.astrosurf.com/jwisn/centaurus.htm, shows a big illustration of Centaurus and Crux. Too big. So, I decided not to place it here.
posted by Starnamer @ 5:11 pm
![]()
![]()

1 Comments:
At 8:22 pm, January 10, 2006, ...Vinay Bharadwaj said…
Hey Charles,
Luv'd the orion pic. I've taken a similar pic, of course just with my SLR using 50mm f/1.7 lens. I've got it processed but, I've got to scan it and convert it into digital format before posting it on my blog. ;-)
Post a Comment
<< Home